As cyber threats continue to evolve in both frequency and complexity, security operations must adapt to stay one step ahead. Automating monitoring and incident response processes is no longer a luxury but a necessity in maintaining a strong security posture. By integrating advanced SIEM and SOAR solutions, security teams can significantly reduce response times, minimizing the impact of potential breaches.
In this post, I’ll show you how to build an automated SOC environment using Wazuh for comprehensive threat detection, TheHive for incident tracking, and Shuffle for orchestrating seamless automation workflows, empowering organizations to respond to threats swiftly and efficiently.
Overview of the workflow :
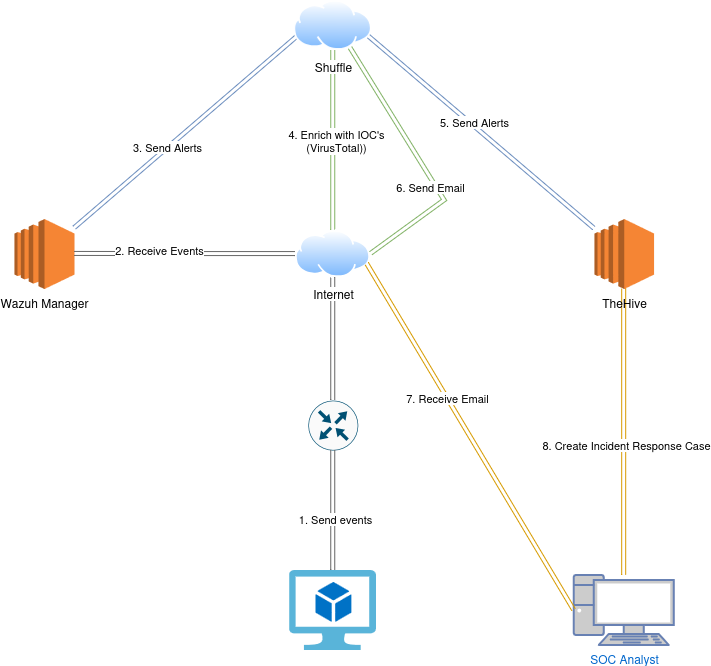
In this setup, we have four main components:
- Endpoint: A Windows machine running on VirtualBox, acting as the monitored system.
- SIEM (Wazuh): Wazuh Manager hosted on AWS as an EC2 instance.
- SIRP (TheHive): Also deployed on AWS as an EC2 instance.
- SOAR (Shuffle): An online platform used to automate responses and redirect alerts to TheHive.
Process:
- The Windows machine is connected to the Wazuh Manager and functions as a Wazuh Agent, sending logs directly over the internet.
- When a custom rule detects the execution of specific malware (in this case, Mimikatz), a use case is triggered on the Windows machine, and an alert is generated in Wazuh.
- Wazuh then forwards the alert to Shuffle via a webhook. Shuffle extracts the most important fields from the alert and performs a quick VirusTotal scan to enrich the IoC (Indicator of Compromise) for better incident analysis.
- The enriched alert is then forwarded from Shuffle to TheHive via API.
- Shuffle also sends an email with a summary of the incident.
- A case is automatically created in TheHive, allowing for collaboration, analysis, reporting, and incident flagging.
Setting up the environment :
Windows Machine:
In this lab, the Windows machine is different from the previous one. This time, we are running Windows 10 as a virtual machine with a bridged IP address, not NAT.
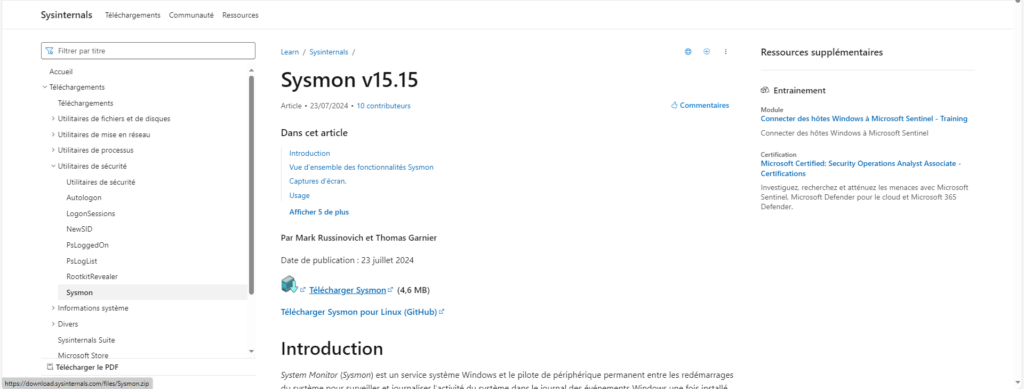
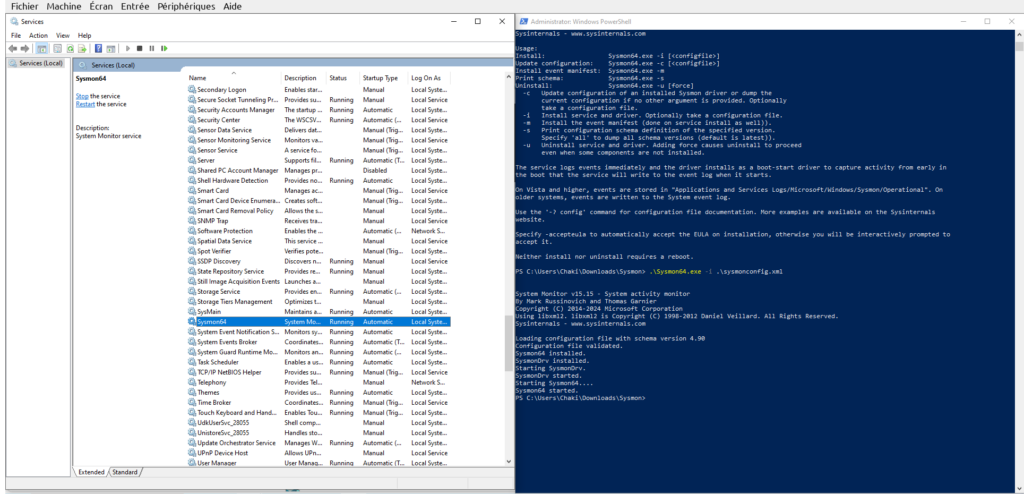
We installed Sysmon from GitHub, as shown in the image below. Sysmon will help us by generating events related to process creation and other important activities, which we can then forward to the Wazuh Manager for analysis.
Wazuh Manager:
The Wazuh Manager is deployed on an AWS EC2 instance with 8GB of RAM and 30GB of storage. It was installed using the following command:
curl -sO <https://packages.wazuh.com/4.7/wazuh-install.sh> && sudo bash ./wazuh-install.sh -a
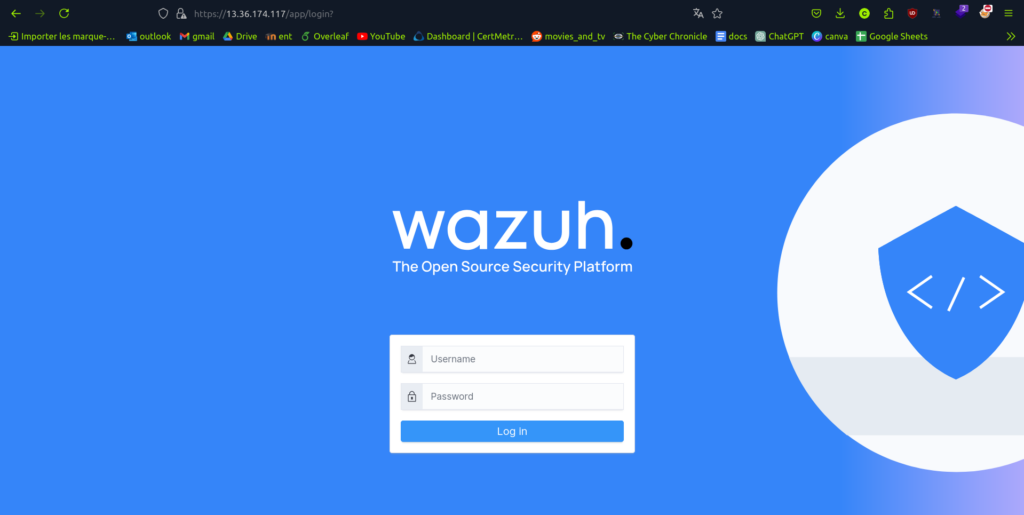
We can access the Wazuh dashboard via the public IP of the EC2 instance, as shown in the image below.
TheHive:
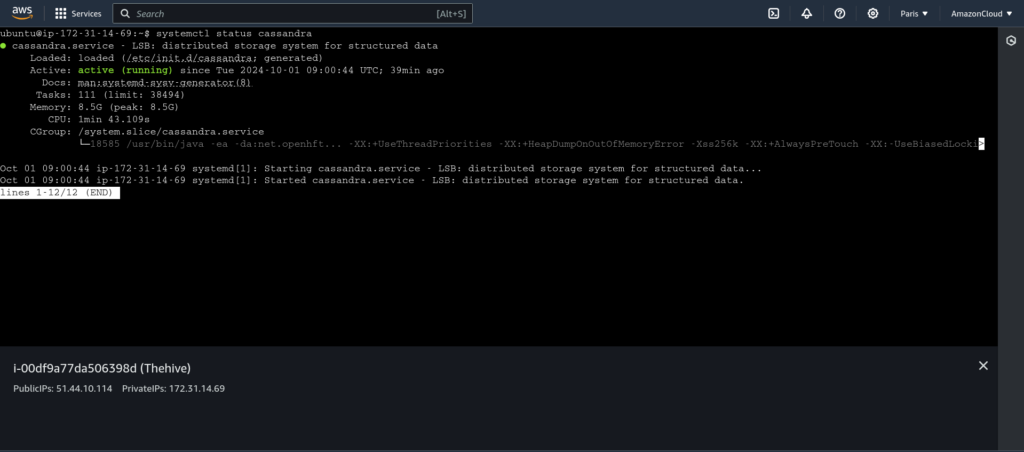
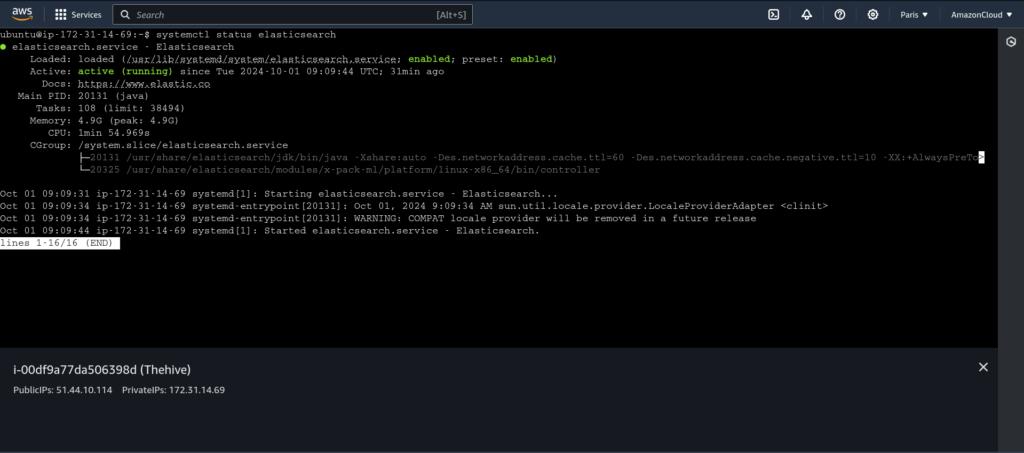
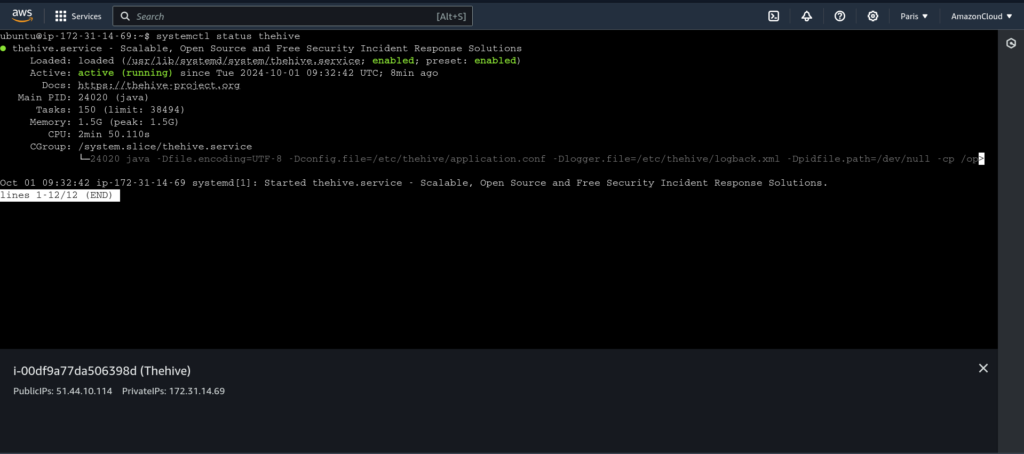
The installation of TheHive is a bit of a marathon. First, we launch an instance similar to the one hosting our Wazuh Manager. Then, we follow the tutorial on the official blog (I will include a link here : https://docs.strangebee.com/thehive/installation/step-by-step-installation-guide/). The process involves installing Java, Cassandra as the database, and Elasticsearch as the indexer, followed by TheHive itself. All three components run as services, which means there’s a lot of configuration involved, especially when it comes to replacing the default IP addresses with the local machine’s IP address.
Fortunately, AWS handles the NAT for us, so we don’t need to worry about that aspect. However, I faced significant challenges during this step. Initially, I configured TheHive using the public IP address, which caused Java to refuse to bind to it. Troubleshooting this issue took an entire day, as it was a long and complex process.
Finally, all three services should be up and running as shown below:
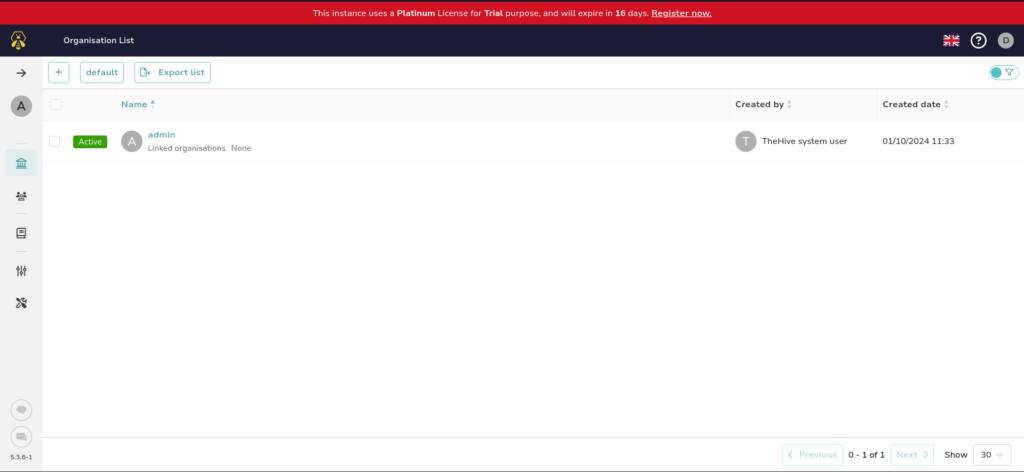
And you will eventually be welcomed with this interface :

We login with the default credentials.
Adding Windows as a Wazuh Agent
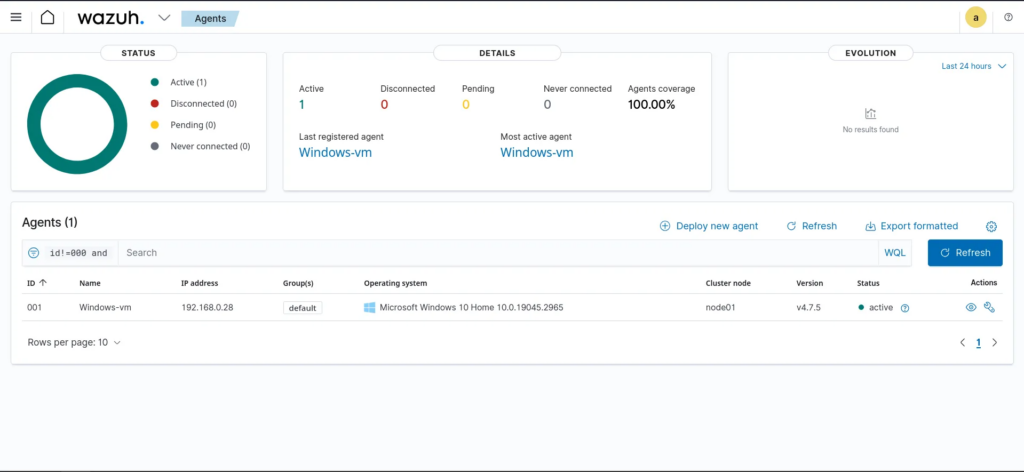
To add the Windows machine as a Wazuh agent, we start by clicking the “Add Agent” button on the Wazuh dashboard. This takes us to an interface where we specify the Windows operating system and the IP address of our Wazuh Manager. We then copy and paste the command provided to install the agent on our virtual machine, as shown below:


Side Note: Don’t forget to open ports 1514 and 1515 on the Wazuh Manager instance, as the firewall does not allow this traffic by default. You can test the connectivity using PowerShell with the following command:


Whoa! we can now see the windows appearing as an agent !
Configuring Wazuh to Retrieve Sysmon Logs
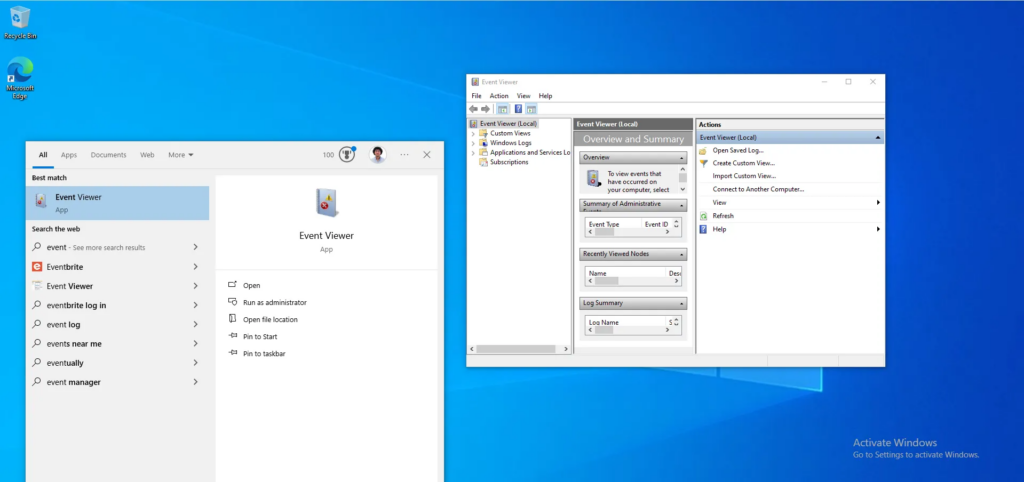
This step is crucial because Wazuh, by default, does not retrieve all logs; it primarily collects the most important ones, such as authentication events, etc. Therefore, we need to configure this step manually. We go to the Event Viewer and search for Sysmon to copy the process event name. This allows us to specify it in our Wazuh configuration, as shown below:
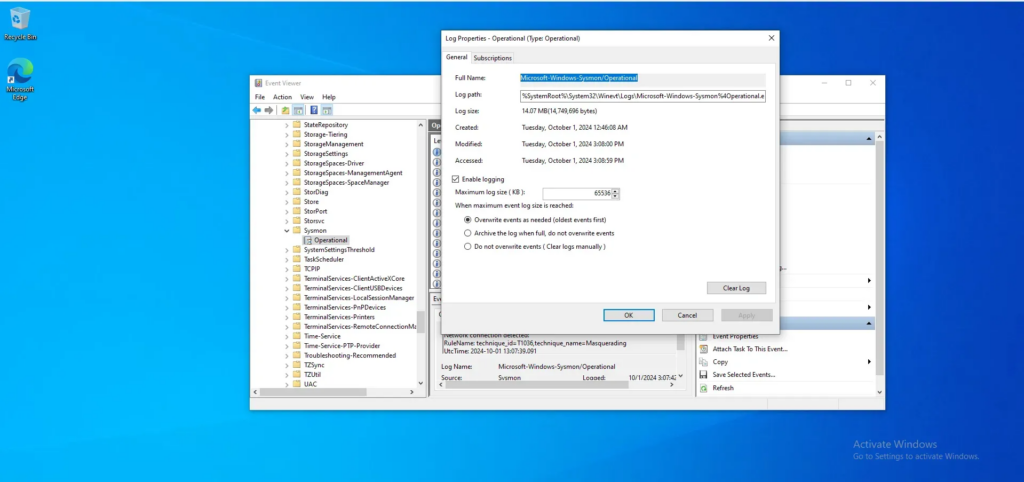
Next, we can proceed to open ossec.conf, located in the Program Files (x86)\\ossec-agent directory. Make sure to open it as an administrator, and then add the following log analysis configuration:

Restart the Wazuh Manager after making any configuration changes—it’s a good practice to do this consistently.
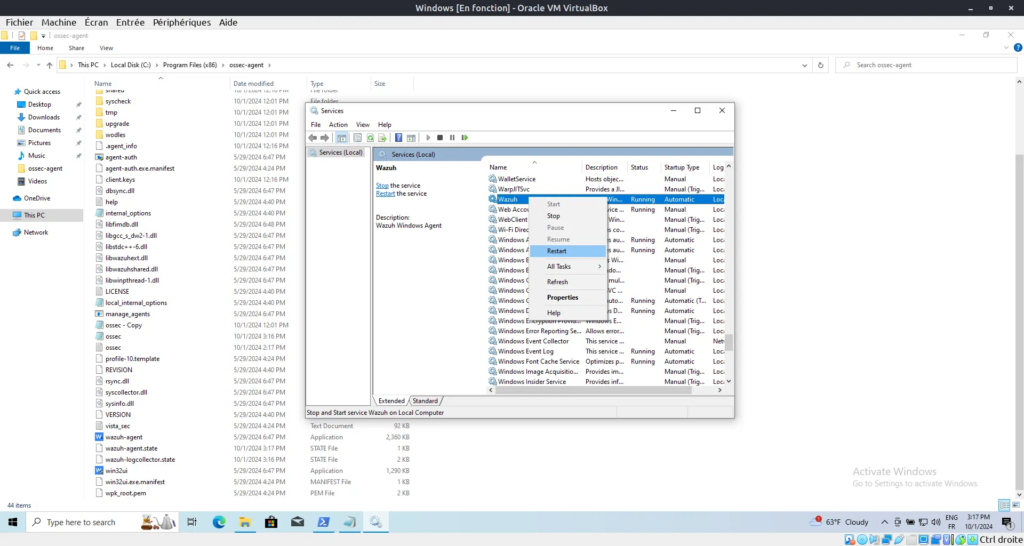
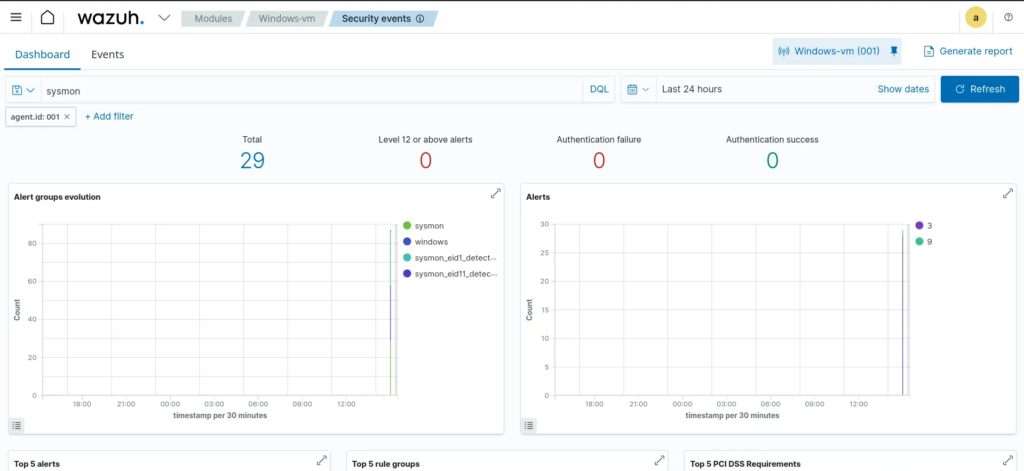
We can now observe Sysmon in the Wazuh dashboard:
Shuffle:
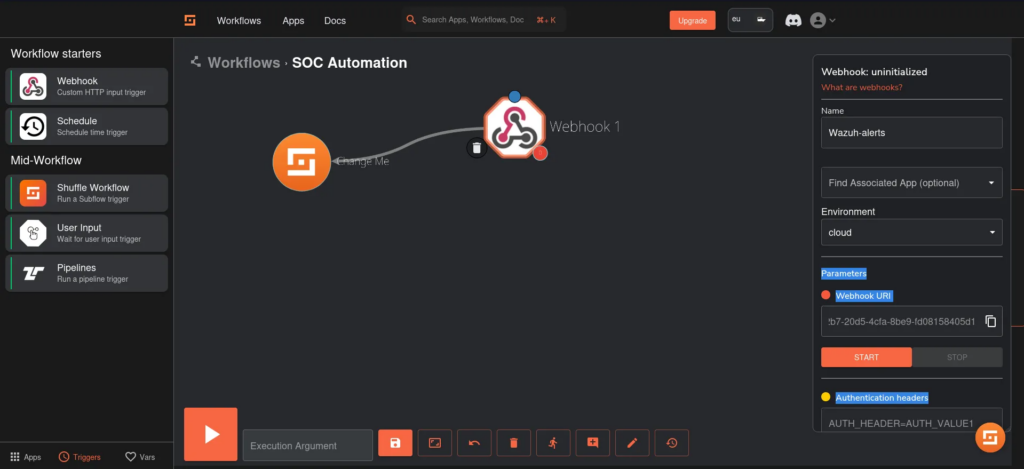
Setting up Shuffle is a straightforward process. We simply sign up for an account and get it up and running.
Creating the SIEM Use Case and Customizing the Mimikatz Alert:
Downloading Mimikatz.exe
We should exclude the Downloads folder from Windows Defender to prevent it from interfering with our operations.

We proceed to donwload the file :
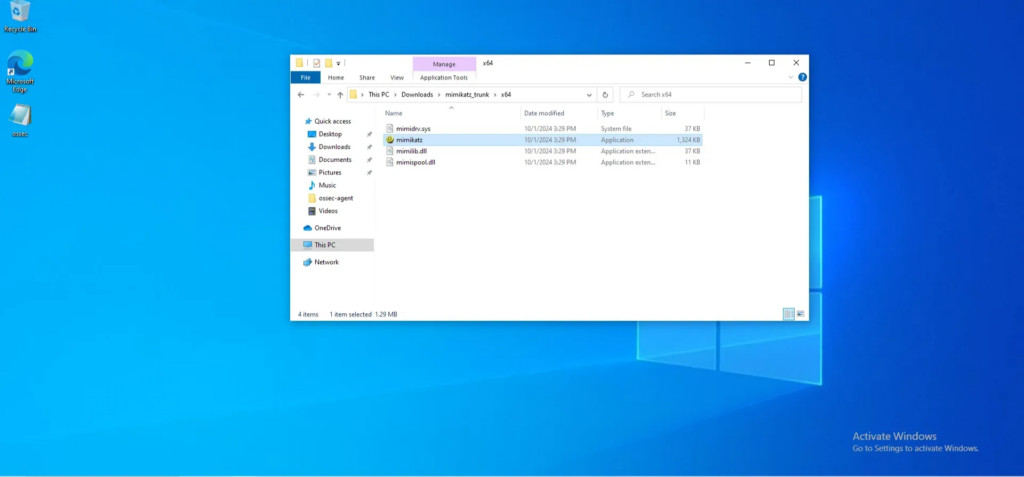

Surprisingly, Wazuh does not detect the execution of this malicious file. This is why we need to create a use case, configure the log forwarding manually, and establish a rule. That’s what we’ll be doing next!

Modifying ossec.conf
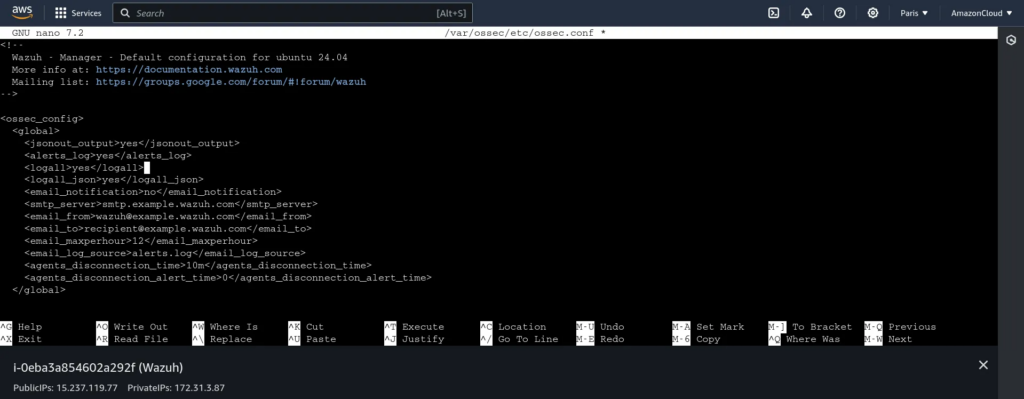
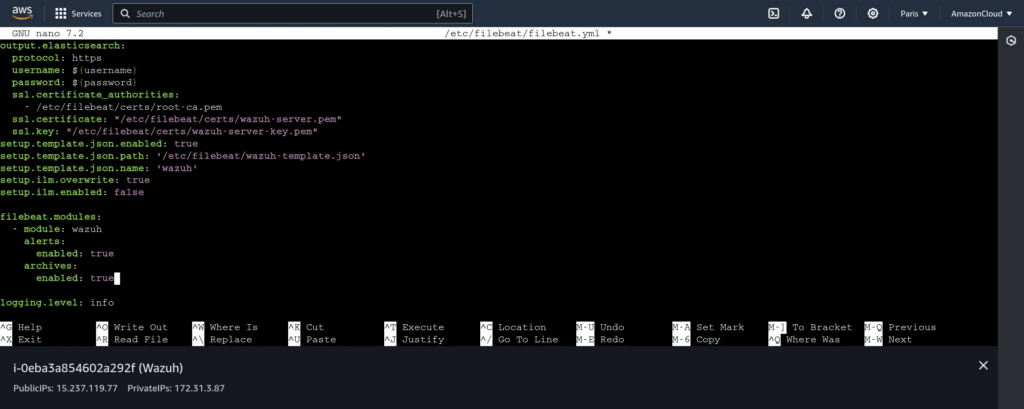
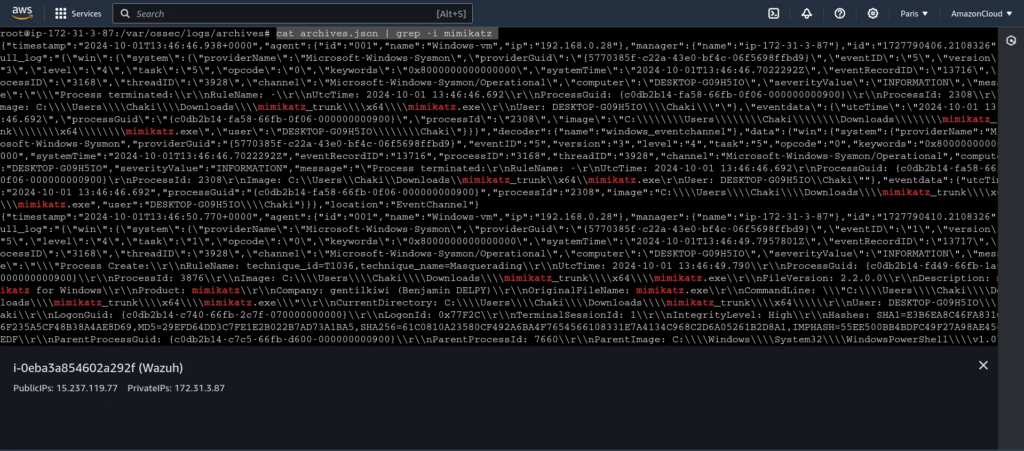
We navigate to the configuration file and set log_all to yes and log_all_json to yes. These options will help collect all the logs. Next, we need to modify the Filebeat configuration to enable the creation of archives for our logs. Create an archive for them as shown below:

Creating an Indexer to Point to Our Logs
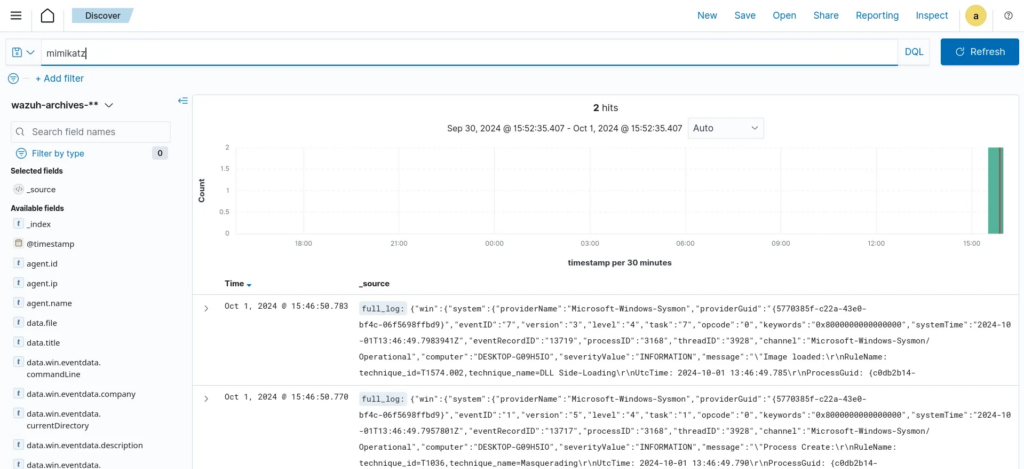
Next, we need to create an indexer in Wazuh to retrieve all logs from the archive. This will allow us to focus on our Mimikatz process and proceed with the rule creation.
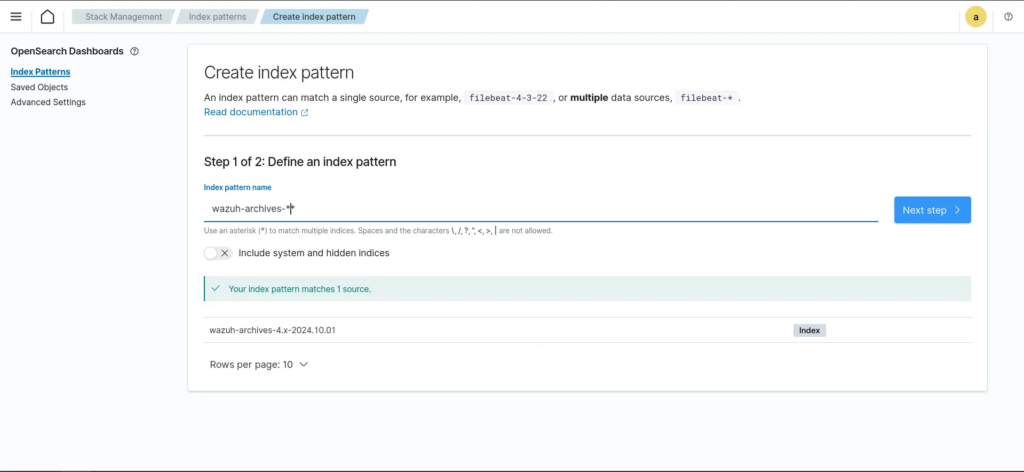
We rerun the Mimikatz executable and can verify that it’s present in the archives by searching for it. Now, it’s recorded in Wazuh!
Creating a Rule to Detect Mimikatz Based on the Process Creation Log
Now, we can write a custom rule to detect the presence of the Mimikatz log and trigger an alert. We will add a custom rule and assign it the ID of 100002, as shown below:

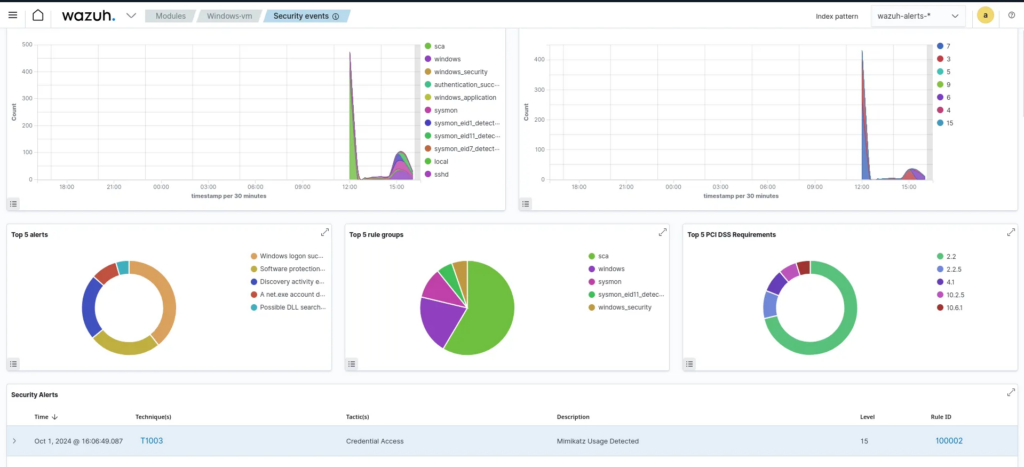
Finally, we receive the alert in Wazuh, and it is labeled as a credential dump, thanks to the MITRE ID specified in our rule.
Adding Shuffler webhook to wazuh config
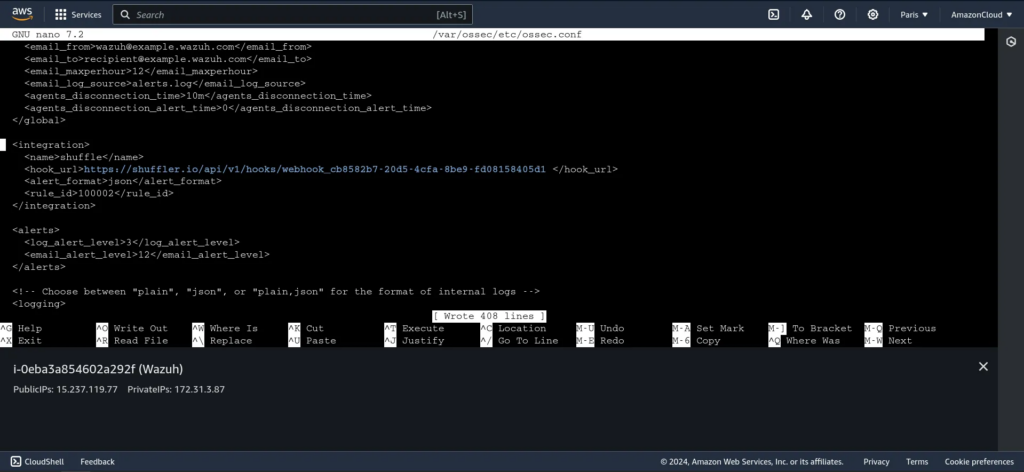
We add the integration rule using the webhook URI generated in Shuffle, and then we reload the Wazuh Manager service as shown below:
Finally, we can observe the Wazuh alert being successfully forwarded to Shuffle, as shown below:
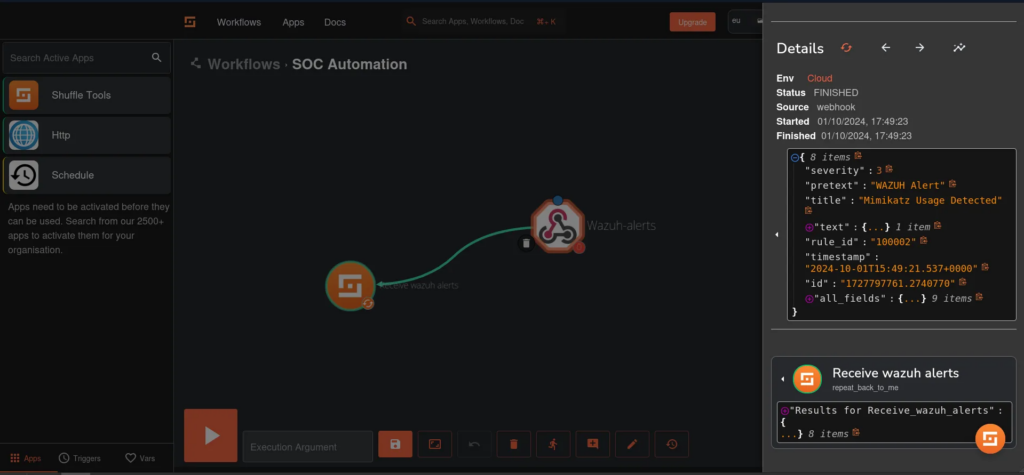

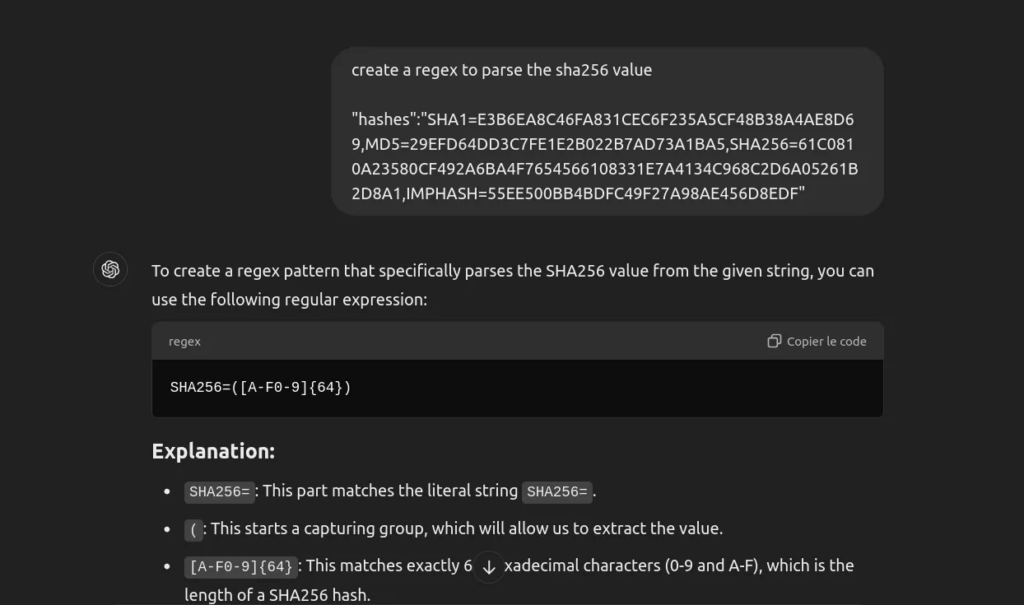
We will parse the hash field of the executed file to extract only the SHA256 hash. This extraction is essential for submitting the hash to VirusTotal for further analysis. To achieve this, we can leverage ChatGPT to generate the appropriate regex pattern that effectively identifies and isolates the SHA256 hash from the alert data. Utilizing regex ensures accuracy and efficiency in our data processing workflow, allowing us to focus on the relevant threat intelligence.
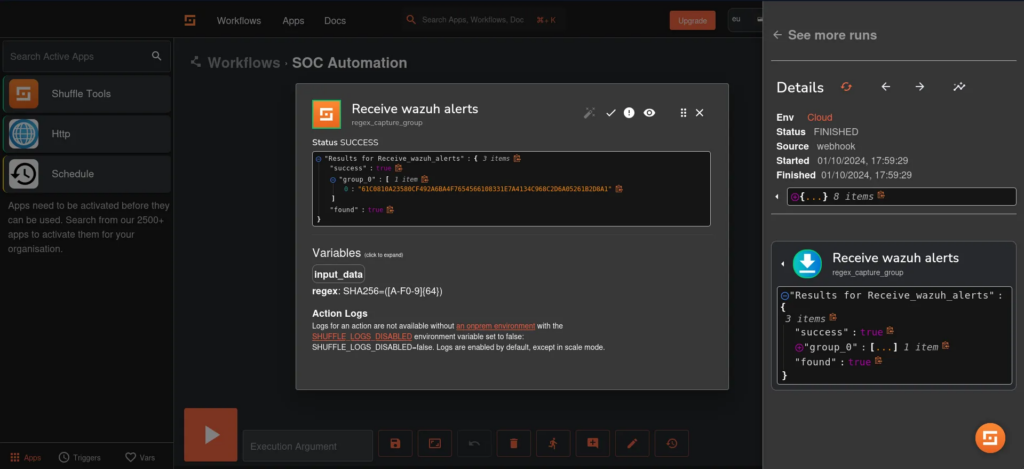
And it works! After rerunning the workflow, we can clearly see the extracted SHA256 hash displayed in the output. This successful extraction confirms that our parsing logic is functioning correctly and allows us to proceed with submitting the hash to VirusTotal for comprehensive threat analysis. The extracted hash is highlighted below:
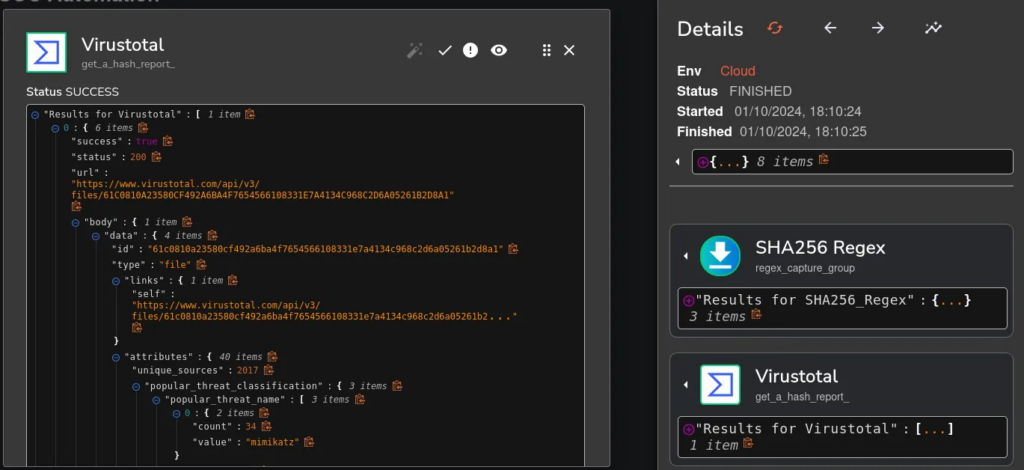
We register on VirusTotal to gain access to its powerful threat intelligence capabilities. After completing the registration process, we obtain our unique API key. This key is crucial for authenticating our requests when querying VirusTotal for analysis. We then insert the API key into the trigger configuration on Shuffle, allowing us to automate the submission of hashes for analysis seamlessly.

We rerun the workflow, and VirusTotal successfully retrieves all the information related to the Mimikatz hash. This analysis provides us with valuable insights into the threat, including details about known indicators of compromise, detection ratios across various antivirus engines, and any associated threat intelligence. By leveraging this information, we can assess the severity of the threat more accurately and determine the necessary steps for remediation and further investigation.
Configuring TheHive
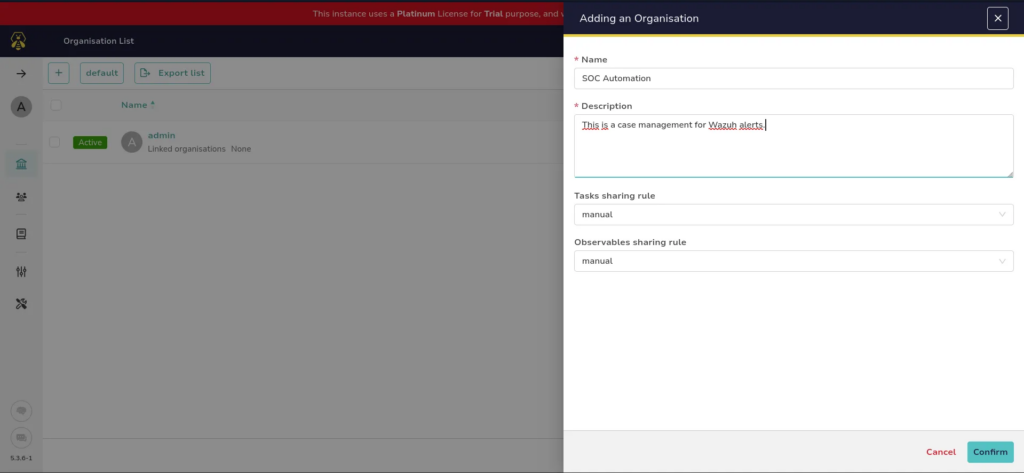
let’s configure thehive and create an organization
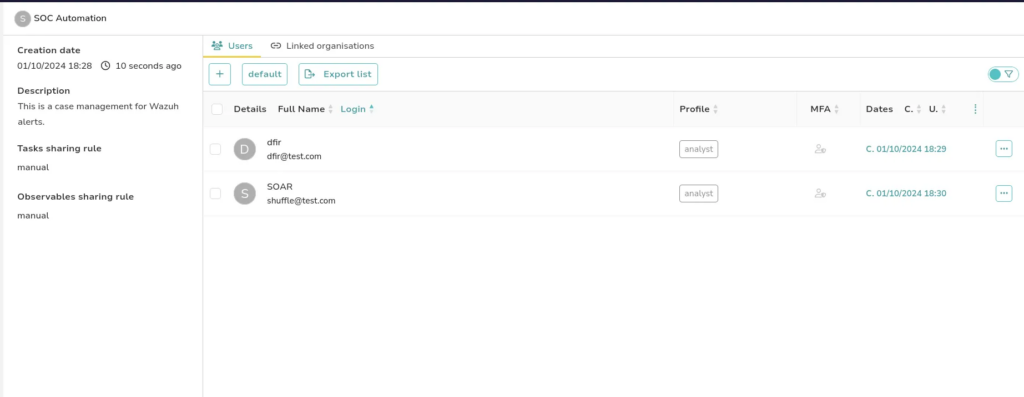
We then create two users
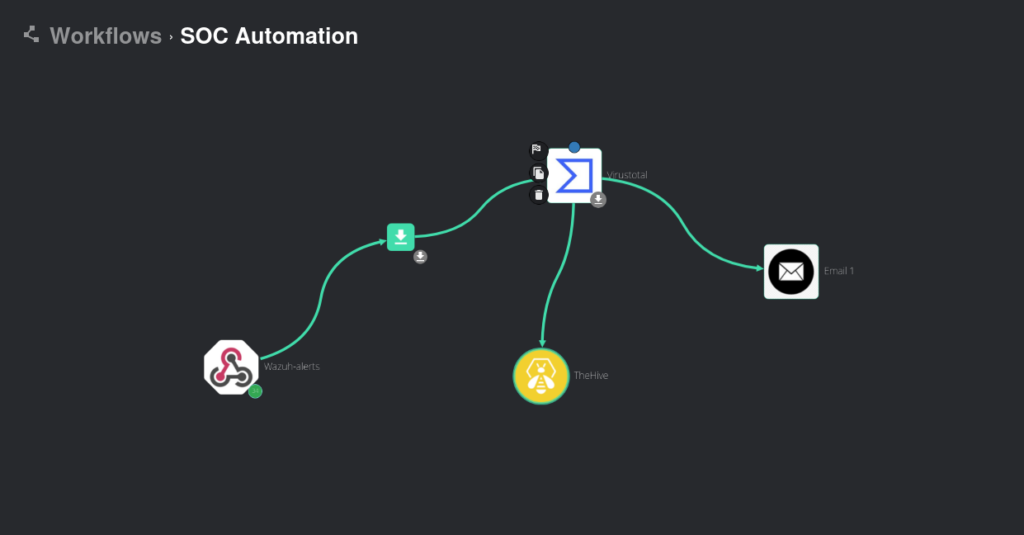
We add TheHive to our Shuffle workflow.
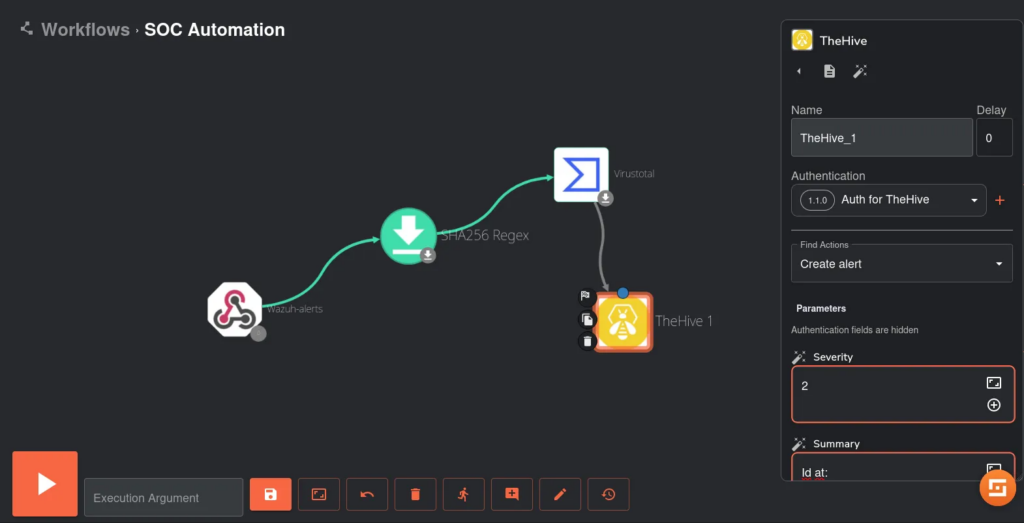
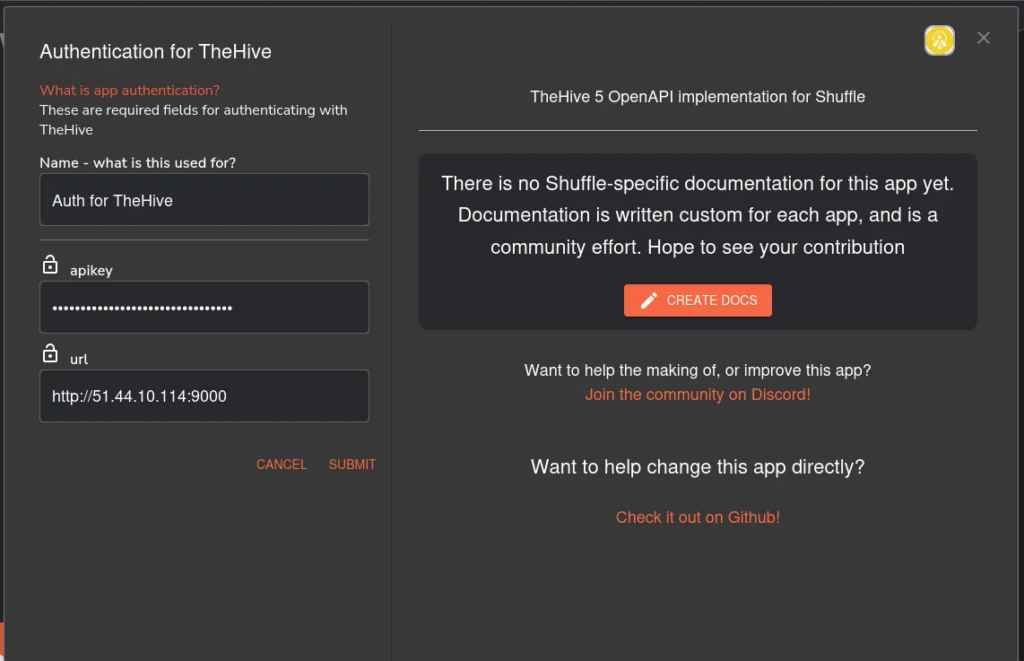
We configure the fields of our alert in TheHive to determine what information we want to forward. This includes customizing the severity, tags, summary, title, and timestamp of the alert. Our goal is to make the information easily readable and actionable for SOC analysts. By ensuring clarity and providing relevant context, we enhance the analysts’ ability to respond effectively to incidents. The configuration is illustrated below:


And we rerun the workflow once more:

After rerunning the workflow, the alert is successfully forwarded to TheHive. This integration ensures that all relevant incident details are captured and organized for further analysis, enabling us to respond effectively to potential threats. The forwarded alert includes critical information such as the Mimikatz hash, the triggering user, and associated timestamps, as shown below:
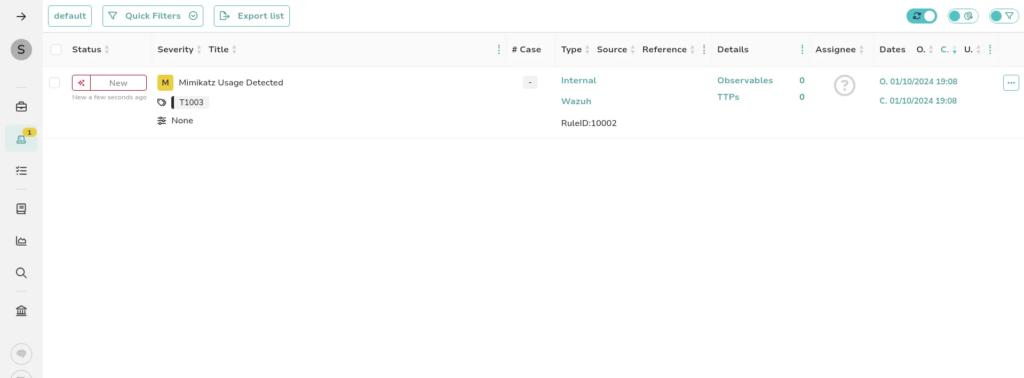
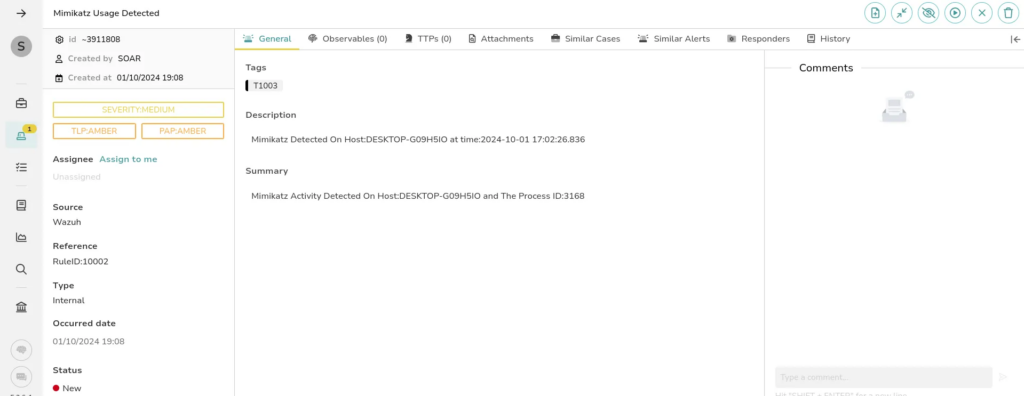
We can even create a case for our alert in TheHive, leveraging the power of this platform to streamline our incident response process. By generating a case, we can organize all relevant information, track the investigation, and collaborate with team members more effectively. TheHive allows us to document findings, assign tasks, and manage the overall workflow, ensuring a comprehensive approach to addressing the Mimikatz threat and enhancing our cybersecurity posture.

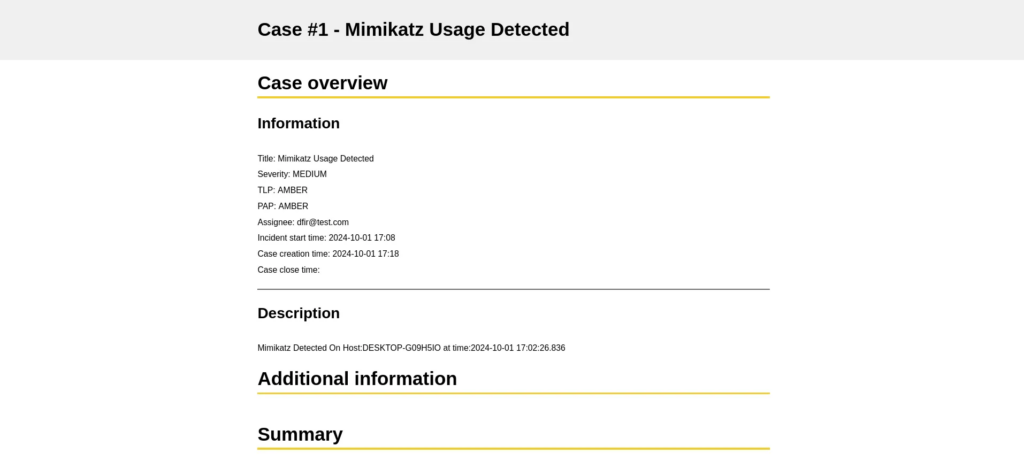
We can create a report for the case using either HTML or Markdown formats, allowing us to present the information in a structured and visually appealing manner. This flexibility enables us to tailor the report to our audience, whether for internal documentation or external stakeholders. By generating the report, we can summarize key findings, document actions taken, and outline recommendations for future prevention. The following example illustrates how to format the report:

Configuring E-mail Alerts :
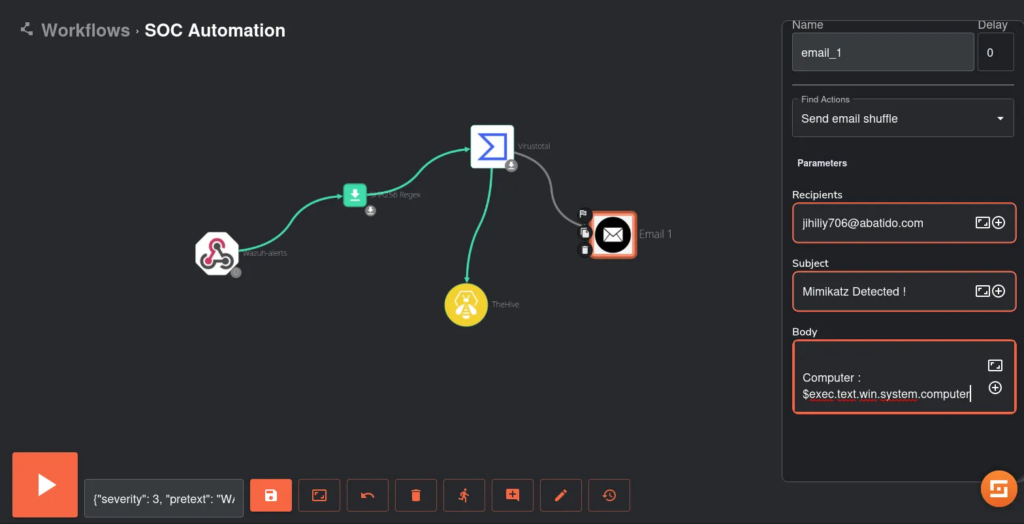
We add the email trigger to To enhance our incident response capabilities, we add an email trigger to our Shuffle workflow. This allows us to receive immediate notifications whenever an alert is generated. The configuration process involves specifying the recipient’s email address, customizing the subject line, and defining the message body to include key information about the alert. This ensures that stakeholders are promptly informed about any security incidents, as illustrated below: shuffle like this :


Conclusion:
This project provided incredible insights into Wazuh, a tool I discovered some time ago but hadn’t had the opportunity to explore in depth. Throughout this process, I also became acquainted with Shuffle and TheHive—two powerful tools that have broadened my understanding of the Security Operations Center (SOC) landscape. By integrating these technologies, I’ve gained valuable experience in automated monitoring, alerting, and incident management, all of which are essential skills in the cybersecurity field. This hands-on experience has not only enhanced my technical capabilities but also deepened my appreciation for the importance of effective threat detection and response in today’s security environment.
